Wednesday, 22 July 2015

Day 38

Day 38

Daddy's birthday!


It's been quite busy here with Shem working long hours and weekends too. So I've been head down, tail up, keeping our busy household running. 3 little boys sure does produce a lot of washing & cleaning!  (Not to mention running, jumping, wrestling, crawling, standing, playing & generally being active, outdoor boys!)


Over at Bedwell St...
The shed installation has begun.
It's looking quite grand!
The road base has all been compacted into a neat driveway & staff car park to the left as you drive in. 
Here's the boss on the phone...
Remember the huge piles of 'black clay' the boys 'broomed' their trucks over? Well, they are no more. 
When it rains, we don't really fancy the shed getting flooded...so they've created rises to help guide the water down to the gully behind. Pretty smart, I reckon 😉

On the house side...the back wall has been framed up and windows installed. The windows you can see here are positioned for stage 2 of the reno...this will be our ensuite window on the end, and to the left a laundry door, followed by main bathroom window. 
It's a bit complicated! But for now the large window will be our bedroom and the door & window are part of the current laundry area.


View from inside the back verandah. 

The laundry and main bedroom from inside. 
(I tried to do a panoramic shot so you can see all the walls...so looking into the laundry slider door the existing toilet door on your left, out to the newly enclosed back verandah and then the new kitchen stud wall on the right with a cavity slider, which will lead into a Butler's pantry after stage2 reno. Eeek!)

Main bedroom panorama shot.

And the kitchen....

has a wall!!! 
You can see where the cavity slider goes, currently through to the laundry  (future Butler's Pantry). To the left of the cavity slider will sit the fridge, and to the right, bench space with free-standing oven and canopy range hood in the centre. Either side of the canopy range hood will be beautiful Jacaranda timber open shelving. *sigh* 
Hard to believe, never did I think I'd ever design my own kitchen!! It's such an incredible blessing. 

Opposite the benches on the wall & the fridge will be a massive island bench, which will house the sink, dish washer, bins etc. And lots of barstools on this side! 😊 
A glass door at the end of the kitchen and some pendant lights above the island bench...and that completes our open plan kitchen area.


Here Shem & Vaughn are standing to the right of the kitchen area. The first wall space is for a glass door (end of the kitchen area - lots of light & air flow), followed by a stacked sand stone feature wall, and then the large opening is for timber french doors, leading out onto (stage 2/3 reno's)...a large back entertaining deck 😄

I'll try to show the area in a panoramic view...


Okay, so everyone is moving & blurry (ahem, poor photography..)..but you can make it out for the most part. Joshy is standing at the kitchen wall you've seen above, and Shem & Vaughn still next to the timber french doors in the dining area. Behind Shem there's a large window before wall space where the current fire place will be moving to. This will become the lounge area, with our big corner lounge to recline and soak up the warmth...ahhhh. 

Around from this is the 'study nook'. Hopefully a desk top running the full length of this space, enough for three sets of drawers under the bench & 2 chairs...as well as more Jacaranda open shelving up above. *sigh* I'm so excited about this little nook 😁

Here's a panorama of just the back wall, you can see more of the study nook here. It isn't proportional though,  so don't be deceived 😊 we don't have a curvy house 😂

Well, that's it for now folks. Catch up with you soon!


Thursday, 9 July 2015

Day 25

Day 25.

The last few days have seen some big changes. Dad has been working like a trooper helping to renovate the carport area into part of the home. Chad and his team have been making some ground work with where we need to be, in order to move in by the end of the month/start of August.
Who knows if we'll get there!

Mum & Dad's cosy camp site with a view 😊

So progress shots for the carport extension over the past few days...
First wall framing going up - this front recess you can see will be a study nook within the living area.

Gives a feel for how we are extending the original house and what the new size will be.

Back verandah after raising the roof height.

Wall framing for the carport really taking shape now, and some external sheeting going up. 


That brings us to today - Thursday 9th July and day 25 of the reno. Hold onto your socks... 
(Well, I had to!)
Standing at the front door looking across the living area...the original external wall sheeting..gone! 
You can see through to the new stud wall in the carport now. 
Looking back across from the other direction.
Up to the left is the study nook, then original front windows and front door. To the right is the kitchen area. 
Night time view of the kitchen area and back verandah, which will be closed in soon and be part of the galley kitchen too 😄
Back sliding glass doors to a deck...insert here 😊

Dad, you've really amazed me today! And I feel like I can finally visualise/get a sense of the space it will become as one open living area. 

Very excited! 😁

And finally...some of the cherubs.


Pegs.    Best. toy. ever. 

Hope everyone's rugged up warm & cosy on this chilly night. Signing off for another day. 


Monday, 6 July 2015

Day 22

Day 22


On the shed/business side, multiple loads of recycled bitumen and road base were dropped off with the view to create our business driveway and carpark in the coming weeks. 

The shed apron was prepared for a concrete pour later this week. 

And on the house side, yellow-tongue flooring laid in the carport area.
And flooring pulled up on the back deck, ready for yellow-tongue. 

That's all for today 😊


Day 21

Day 21- quiet Sunday...no work today.
At this first stage of the renovation, we are extending the house to the right (into the garage) and to the back (closing in the back verandah) to give all the rooms on the back side of the house a bit more space. Ie. Main bedroom, bathroom, laundry and then kitchen & living area.

You can see in this picture of the front of the house, the extensions to the right (carport area). If you look to the left of the photo, you can see down to the AAA trailer, and the slab is just behind it. Just to give an idea of distance from the house. (I.e no more fish bowl! 😆)

This photo gives an idea of both the right and rear extension.  The back door and floor length window you can see here are into the kitchen/living area.


And...inside. I'm standing at the back door here to take the photo. So it's currently quite a small space for the 5 of us, but will be nice & roomy once we extend. You can see over to the front door through the lounge/living area too. The centre wall here, dividing the kitchen from the lounge and entrance area, will be removed. 
After we extend to the right (which is to the left in this photo), and onto the back deck, we will have created one large open plan living area. 😄
Lounge living area with fireplace. 

Now walking down the hallway, back rooms...
Laundry (toilet is off to the left here)
Bathroom (we'll probably tackle this one stage 2 of the extension)
Master bedroom. I'm taking these photos on my phone, so not very good at capturing the whole room. My favourite part of this room is the huge window with a VIEW! 😍 Hip hooray! Love it. 
And the kids toys, Mum has scrubbed them all up ready for sale! Takers anyone? 😉😊
Mum did so much behind-the-scenes work, cleaning and washing all our outside kids toys, packing the garage out here with storage stuff we can move early...I don't know if I could have done anything without her, especially not her careful sorting & washing. Thanks so much Mum!! Couldn't have done it without you xx


So all the rooms above will be extended as part of this first renovation. The master bed will be bigger, and so will the bathroom and laundry. These two rooms will probably stay as they are however, until we get to stage 2 of the reno. 
Just for interest sake, the two rooms on the front side...


There are built-ins in both rooms and full length windows onto the front verandah and gardens.

So that's it folks...our humble abode 😊 

Stay tuned...


Saturday, 4 July 2015

Day 20

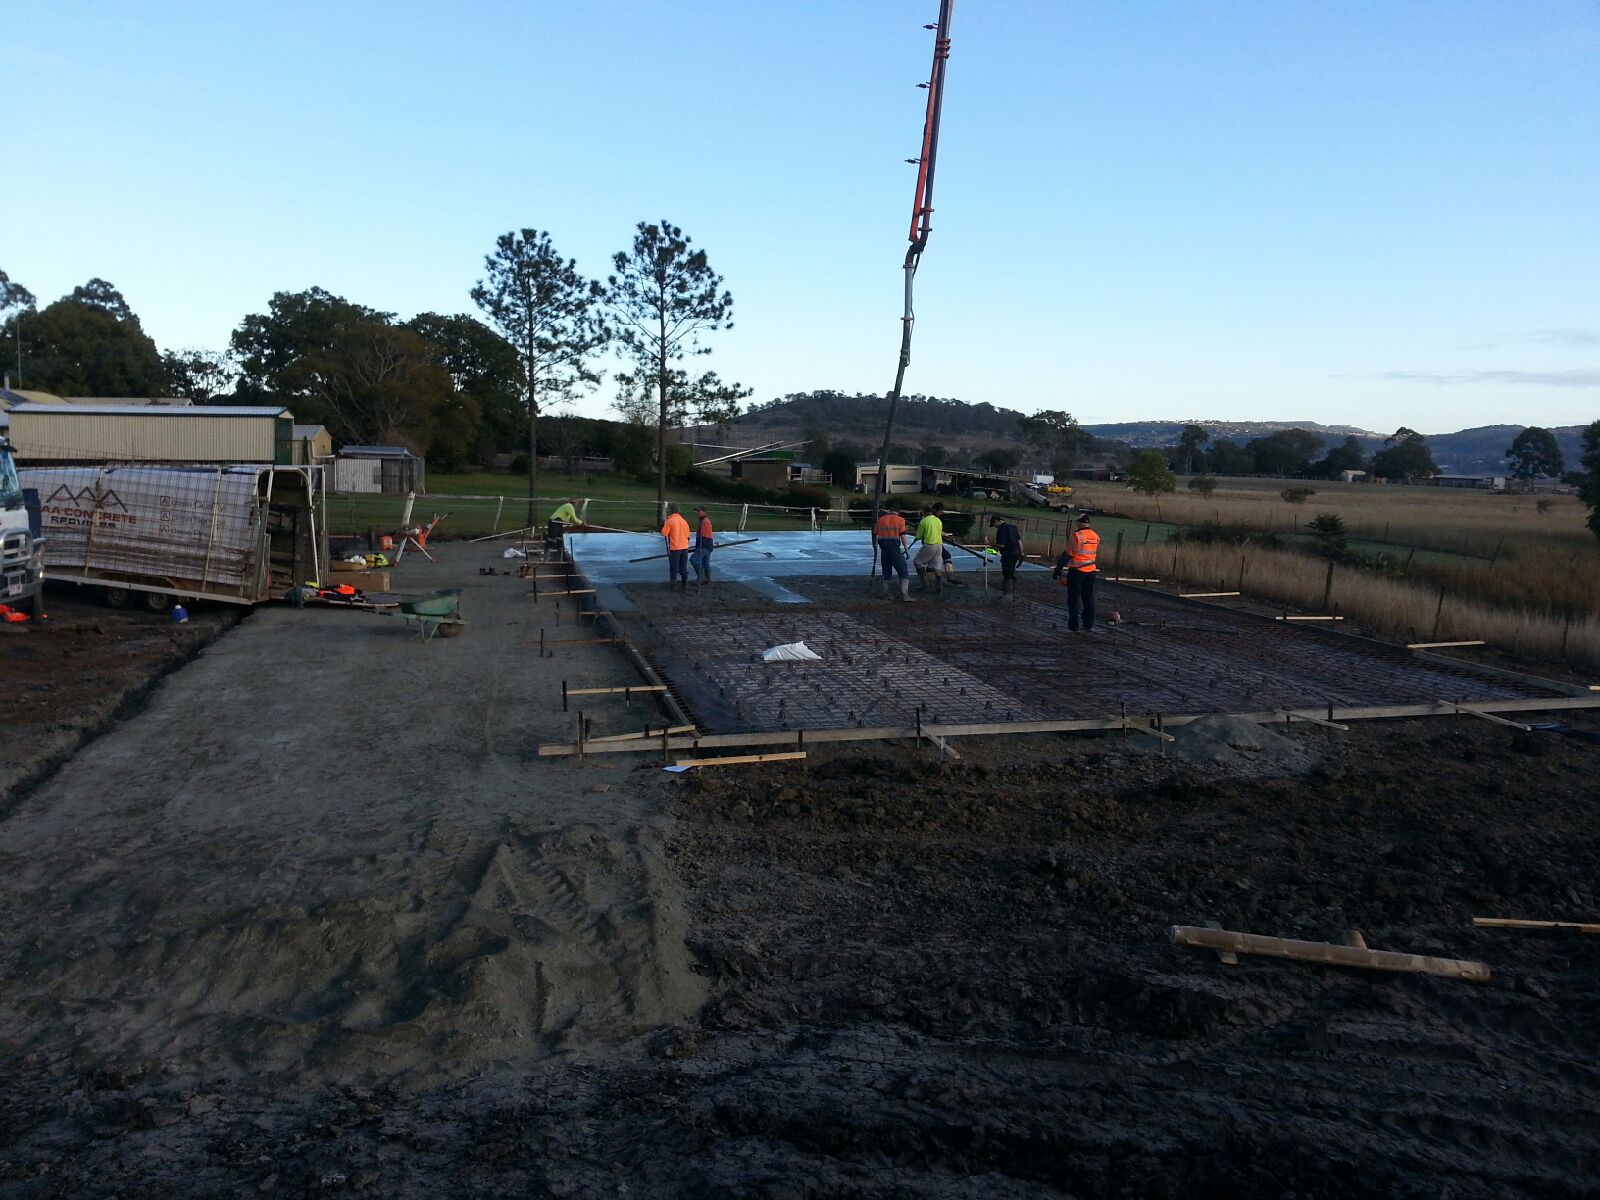
Day 20 - shed slab stage 1.

Up early for a pour today...


When the boys and I arrived, all the concrete was in. 

And the pump truck was packing up. (Nice looking pump truck too *wink wink)

Pretty awesome to have such a great group of people helping today. Thanks so much everyone, and to all your families for supporting ours! So much love 😊

Joshy climbing up to watch Uncle Wayne closing the rig down. Pretty cool views from this clay pile...
Learning all about the pump truck from Uncle Wayne.
Screeding off the slab. Skillful hands at work (thanks Steve!)
The first stage which you can see is the inside of the shed walls. Stage 2 will be an 'apron' out the front which will be undercover. Like an awning, but big enough for the trucks to park. 

In this photo you can see the apron and busy little Isaac helping away. Well, actually he's just using a dustpan to shovel dust around...but he's doing some pretty good imitation!
Hopefully this photo turns out okay, but I wanted to show a panorama of the space as it is now. You can see at the left-hand side where the driveway will curve in down to the shed and in the middle of the picture where the dirt has been cleared is a turn around/truck and trailer parking for all the work vehicles. 
Looking forward to seeing this shot change in the weeks ahead as the road base goes down and the shed goes up!

Signing off...